


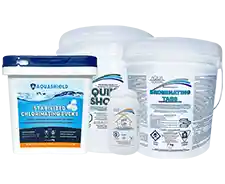
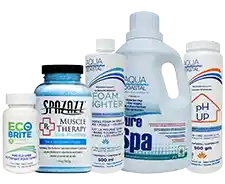


Accessory Package Options

Proudly Canadian

Everything You Need to Know to Open Your In-Ground Pool At Home
Published 01/03/25

Here in Canada, we know it’s all about the backyard pool season. After a cold winter and rainy spring, there’s no time to waste as the temperature starts climbing. If you’ve been waiting around for a pool company to open your pool, the wait is over, because opening your pool is easy to do yourself.
Bear with us, because there are a lot of steps, but we promise you’ll be a pro pool opener by the end of this and definitely the family hero (although that one, we can't promise).
If you’re ready to open your in-ground pool, keep reading. If you have an above ground pool you’ll want to check out our other guide here.
1. First Thing’s First, Dust Off the Old Pool Cover
No, seriously, clean off your pool cover with a soft broom. You want to do a decent job at this since anything you miss is going to end up in your pool. Next you want to clear off any still water sitting on the cover. A submersible pump should help you get the job done quick.
2. Strip the Cover Off the Pool
Remember we said you’ll be the family hero? That depends on who you rope in to help you with this task and how the next 10 minutes go.
You’re going to start on one end of the pool, with each of you standing on either side. You’ll end up with the pool cover off on the opposite end of the pool, so think about which side you want to land on to store the cover.
You and your partner will lift the cover and fold it onto itself like an accordion, revealing more of your pool with each fold until the entire cover is folded back.
When you reach the end your cover should be neatly folded but don’t worry about getting it perfect, you’ll open it up again in the next step. Meet your partner at the end and give them a high five. Complement them on their shoes or offer them a bribe because they’re not done yet.
3. Clean and Inspect Your Pool Cover
With the help of your partner carry the pool cover to a spot you can lay it out flat. You’ll want to avoid dragging it on any hard surfaces as that can cause it to tear. Speaking of damage, if this looks like your pool cover’s last season you can skip to step 4 because you’ll want to toss that tired cover and order yourself a new pool cover to have on hand for close.
If your cover is looking good, you’ll want to keep it that way. You can spray it down with a hose and some car wash soap if you have. Avoid using any harsh chemicals on your cover as this can damage the material.
When you’re satisfied with your work, dry off your cover with towels or have some fun with a leaf blower and fold the cover up (neatly this time) for storage.

Pro Tip: If you lost the bag that came with your pool cover (yes, it probably came with a bag, no you’re not going to find it in the garage), you’ll want to store it in an airtight storage container. If you have water bags, you can empty them out and store them in the same container. Just make sure they are completely dry before putting them away.
Optional: You can technically let your partner go, but we recommend sending them ahead to step 5. Alternatively, you could put them on mimosa duty. Both options will save you time later.
4. Raise the Water Level
Now is a good time to drop the hose in the pool and raise the water back to your desired level. It’s perfectly normal to lose a few inches during the winter.
Pro tip: While you’re letting the water run you can move onto step 5. If you’ve already sent your partner ahead, then you can jump to step 6. See, we told you this would be easy.
5. Skim the Pool
Ah, the familiar task of skimming the pool. It’s a chore, but when it’s 25 degrees and the sun is shining, do you really mind?
Use your skimmer to get rid of anything that might have fallen in when you took off your cover and make sure to remove anything that could clog your filter when you turn it back on.

6. Remove Winter Plugs and Reinstall Skimmer Baskets
If you used a service to close your pool last season, they would have winter-proofed your pool by blowing out the pipes and installing winter plugs to prevent water from freezing inside. Maybe you did it yourself. In any case, you’ll need to remove all the plugs from the pipes before reconnecting the rest of your equipment.
Be sure to remove the ice compensator or soda bottle from the skimmer as well as the winter plugs before replacing the skimmer baskets for the season.
Pro Tip: Don’t worry, it’s normal for your in-ground pool to bubble as the water flows back into the pipes.
7. Set Up Your Filter and Pump
You’re getting close. Reinstall the regular drain plugs on anything that had a winter plug including pumps, filter, heater, and chlorinator (if you have them).
Pro Tip: You’ll want to lubricate your O-rings to protect them for the season. A cracked O-ring in the pump is a common problem that results in air getting sucked into the pump. If you spot a crack, replace that O-ring immediately.
Next, reconnect your return side valves to make sure the water being pumped in has somewhere to go. If you have a multiport valve, turn the handle to the waste setting, and re-install the air bleeder, sight glass, and pressure gauge.
8. Run your Filter and Pump
Flip your circuit breaker and start your engines, we mean pump. Prime your pump by letting water flow through. You may need to wash or replace your filter so take a look to see. If you have a multiport valve, switch it from waste to filter.
Pro Tip: some companies use antifreeze when they close pools. If this is the case don’t worry, most of it will come out while the valve is set to waste, but if some makes it through to your pool it will be filtered out over time. The antifreeze for pools is non-toxic and won’t harm swimmers.
In the case that your pressure gauge spikes, shut off the pump and check for anything blocking water flow. You can prime the pool pump again before starting up to make sure water is flowing without obstruction.
9. Re-Accessorize Your Pool
Bring out the volleyball net, diving board, and ladders and get ready for a summer of fun. Now is the time to re-install anything you removed at the end of last season. While you’re at it, make sure you’ve got all the latest accessories to keep the party going strong at your house this summer.

Now we know this is starting to look tempting, but please… don’t actually get in the pool yet. Let’s get that water treated and balanced.
10. Protect Against Metal Levels
It’s common for newly opened pools to contain higher levels of metal, like copper and iron that may have built up over the season. The tap water in your hose may also contain minerals that can cause build up and discoloration. You’ll want to add Pool Protect All to inhibit this.
Pro Tip: You can save money on chemicals with a pool opening kit that comes with Pool Protect All, Non Chlorine Shock, and Algae Shield
11.Test (and Balance) the Waters
Depending on your preference, you’ll want to test your water with test strips or professional grade test kits. Once you have a baseline you can start balancing your pool.
Pro Tip: Remember to balance efficiently, it’s best to adjust alkalinity first, followed by pH, then calcium hardness.
12.Brush and Vacuum the Pool
We’re getting ready to shock the pool, but before you do that you’ll want to brush and vacuum to loosen any buildup that has accumulated on surfaces.
Wow. That’s enough work for today. But seriously, if you used Pool Protect (and you should have) you’ll want to wait 24 hours before shocking the water. So move over to the BBQ and focus on something else for a while.
13.Shock The Pool
You might be wondering why your pool water is still swamp-green and how to get it back to blue. To get your pool crystal clear you’re going to want to shock it, and we recommend a double shock for the start of the season. To do this you’ll use two pounds of chlorine shock for every 10,000 gallons of water.
Pour the shock directly into your pool, slowly, circling the perimeter to distribute it evenly. You could also dilute the shock in a 5 gallon bucket of water and pour the solution into your pool.
Give it a day or two for the water to adjust. While we know “shock” sounds like it’s going to be instant, it takes some time, after all, the water has been sitting there all winter!

Pro Tip: Do not mix different brands of shock, ever.
14.Sit Back, Relax, and Let The Filter Run
Leave the filter running for at least 24 hours and invite your friend over for your opening pool party. Until then, pour yourself a mimosa and blow up the flamingo floatie, because summer is on.

Your Cart
Looks like there’s nothing in your cart.
We can help with that.